

Monday, 26 December 2011
Been Really Ill But...
Had to make a card for someone special who loves all things Kenny K, Can't think why :)
 This is a mixture of a photo and Kenny K Digi Images coloured with Promarkers mounted on to an easel card with the Ferarri logo as the 'stopper'.
Thursday, 20 October 2011
Today!
I spent the day cutting out decoupage pieces ready to make christmas cards, this has to be THE most boring part of card making. I do like to make up from scratch most of the time but I'm hoping to sell some christmas crafts this year at a local schools christmas fete so need to save a little time. I also need to make my monthly donation of cards to Cancer Research so will probably spend tomorrow cutting out even more decoupage for that, well I'm sure that counts towards my crafting target so feel okay about that, especially as it's been a rubbish day health wise, hey ho bring on tomorrow!
Wednesday, 19 October 2011
For My Oldest Daughter
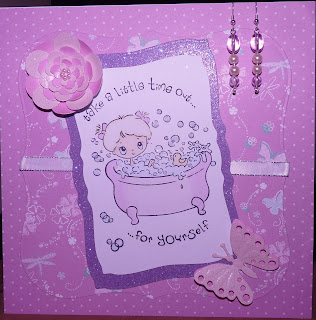
Today I spent time making a card for my older daughter, I tried a combination of new (dies) and old (papers and stamp) and I like the results. I also made her a pair of matching earings, my very first piece of hand made Jewellery. She loves pink so I went all pink! I also used my lovely Flexmarkers on the stamped image, the suble colours really lend themselves to that type of stamp.
I do like Jewellery making but worry about my combinations way too much, I end up ditching all my designs and I know I shouldn't, trial and error is the only way to learn, but I hate making things that I don't really like at the end of my effort. I have a box full of things I made and boxed as soon as I realised I hated it.
I do like Jewellery making but worry about my combinations way too much, I end up ditching all my designs and I know I shouldn't, trial and error is the only way to learn, but I hate making things that I don't really like at the end of my effort. I have a box full of things I made and boxed as soon as I realised I hated it.

Tuesday, 18 October 2011
My First Stamped Candle
I've wanted to do this for ages, so got an old coated candle, some white tissue paper, my stamps, Promarkers and ink pad. I had so much fun with it and was very pleased with the results.
I firstly cut out a piece of white tisue paper the right size to fit around my candle and stamped my image on to it. I wanted to add a hint of colour to the butterflies and writing, so used Promarkers gently on the tissue paper. If you press too hard or if the pen is in contact with the tissue paper too long it will break the paper and/or flood the tissue with too much colour. Once I had done this and my image was ready I wrapped the tissue paper tightly around the candle and then covered with grease proof paper. The grease proof keeps everything together while you heat the candle and excess wax sticks to it.
When you heat, keep the heat source moving or you can over heat and damage the candle, I used my heat gun on high, heating one section of the candle at a time. As the outer layer of the candle melts you can see it quite clearly through the grease proof paper. As soon as you see this happen it's time to move to another section until the whole candle has been heated. I found scrunching a section of the grease proof made a handle for me to hold the grease proof smooth against the candle, you can reposition the greesproof as many times as you like and stop and start as many times as you need to just as long as you keep the stamped tissue paper smooth against the candle at all times.
The most important thing is to use a candle that you are never going to light as the tissue paper around the candle could catch light, not a good thing! lol

Just Adding Some Of The Cards I've Made Since Starting My Card Making
Just thought I'd add some of the cards I've made, for many different reasons, while learning to card make. I've experimented so much with so many different things to try and find the style for me but maybe I'm not meant to have a style?
This one was for a friend who had been through a tough time, Just to say we were thinking of her and hopefully make her smile.

This one was made for a challenge, I love butterflies.

This one was an atempt at sepia tones, not quite there but as a first attempt, it's not awful lol.

This is the first of many cards requested by my son for his friends, I do love these Kenny K images for men, I think they are fab especially for my sons age (20's)

This card was made for a challenge, I really like the colours on this one and love the Sarah Kaye images

This was for a very close friend who has been ill, I was experimenting with Autumn colours.

Thes are two of the first cards I made with dies and my Tatty Teddy summer stamps, I wanted completely pastel summer cards.


Thursday, 18 August 2011
Kenny K & Tim Holtz
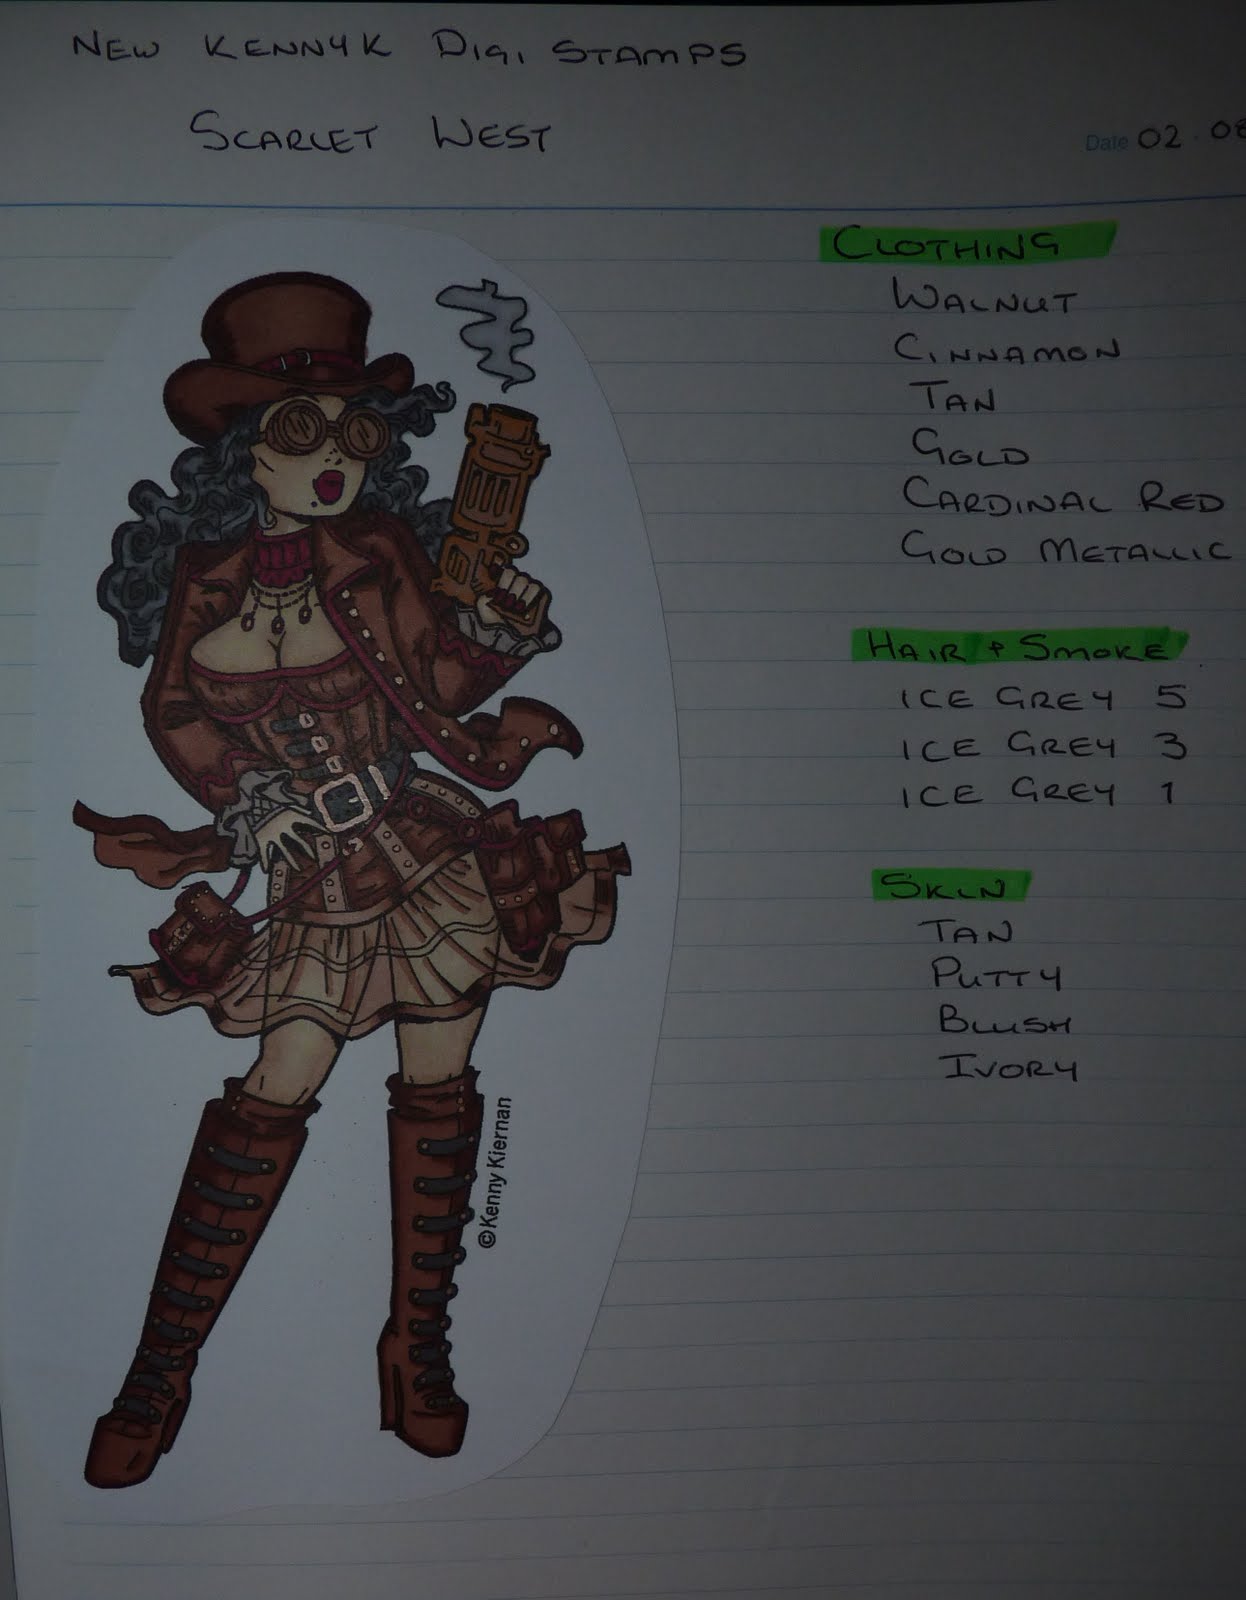
I have been practicing the last few days and have come up with a couple of creations as well as a rough draft of my latest KennyK Digi Stamps.
 I wasn't happy with a few bits so will change them a little and do another rough draft before I make a card up with it.
I've been playing with my Tim Holtz/Ranger stuff again, I really could spend all my time playing with these things but I want to try a bit of everything so I put the box on the highest shelf and only get it down once a week.

 I entered the bottom one into a competition, but I never win, think I need a little more practice, some people's cards are exceptional, but they have been at it for several years and I know I'm still a baby crafter having only been at card making for 6 months or so.
I've been playing with my Tim Holtz/Ranger stuff again, I really could spend all my time playing with these things but I want to try a bit of everything so I put the box on the highest shelf and only get it down once a week.


Friday, 15 July 2011
My New Stamps - Tim Holtz - Papillon

Monday, 4 July 2011
Fanciful Flight

I got my fanciful flight die and thought I'd give it a test run with this card, I also added in a bit of distress painting on a tag for backing. I do love this die and cut with the coredinations card allows for a little extra distressing.
What I used
Big Shot
Fanciful Flight Die
Paper Rosette Die
Tag and Bookplate Die
Plain Dark Brown Card stock 250gsm+ ( For Main Card)
Happily Ever After Mat Stack (For Layering)
Corrugated card Stock (Gold or Light Brown) (For Matting)
Ivory Card Stock 250gsm+ (For Tag)
1 Tim Holtz Journalling Tag
1 Tim Holtz Metal Tag
Antique Wood Acrylic Paint
Natural Acrylic Paint
Crackleglaze
Tea Dye Distress Ink for a little Distressing
Pearl Brad Distressed with a Promarker
Sandpaper Block for distressing the card.
Wednesday, 22 June 2011
Messing About With Cosmic Shimmer Mists

List of Products Used
Black Card Stock
Ivory Card Stock
Big Shot
Grand Calibur
Tim Holtz Tag and Bookplate Die
Tim Holtz Paper Rosette Die
Spellbinders Bird Flourishes Die
Cosmic Shimmers - Lava Red and Blue Ice
Distress Inks - Chipped Sapphire, Lipstick red and Dusty Concord
Stamps - Hero Arts French Script and Tim Holtz Stuff To Say
Crafters Companion - Spray and Shine and Spray and Sparkle (Silver)
I used Black card (A5 size) and sprayed it with Lava Red Cosmic Shimmer Mist, waited for it to dry then sprayed it with Blue Ice Cosmic Shimmer Mist. I think it worked out quite well, it gave me blue and red as well as mixing into purple in places.
I then cut out two tags with my Big Shot and Tim Holtz Tag and Bookplate Die and used Distress Inks (Chipped Sapphire and Lipstick Red) to give me a starting point. I then stamped the top tag with Distress Ink (Dusty Concord) and a Hero Arts French Script Stamp and used my favourite glue to stick the finished first tag on top of the second tag at a slight angle. I then stamped the bottom of the second tag with a Tim Holtz Stuff To Say Stamp. Once it was all dry I attached with my favourite paper glue and began my embellishments.
My first embellishment was from the Spellbinders Bird Flourishes dies. I cut them out with my Grand Calibur and then sprayed them both with Crafters Companion Spray and Sparkle. I waited for that to dry and then finished them off with a light covering of Crafters Companion Spray and Shine.
My second embellishment was a paper rosette made with my Big Shot and the Tim Holtz Paper Rosette Die. This die does all the cutting and scoring for you so all that is left to do is mountain and valley fold the finished piece and use a little paper glue to stick the two ends together. My tip here is to cut out two of the circles that you get in the die, that way you can secure your flower on the bottom and the top and you have a smooth surface to attach to your project. Once the paper glue is dry, press your flower into place and secure with glue, bottom circle first and than add your top circle.
I them added all my embellishments to my card and took photo's to catalogue my journey into crafting!
Wednesday, 15 June 2011
My First Attempt At Crackle Glaze
I really enjoyed making this one and think it came out okay for a first attempt.


Just Starting Out
I'm just starting out with craft so thought that a blog to capture my progress would be a good idea, or not, lets see.
The last few days I have been experimenting with Distress Inks and have really enjoyed it.


I'm loving Tim Holtz products at the moment and think I have found the thing I want to work with.
The last few days I have been experimenting with Distress Inks and have really enjoyed it.


I'm loving Tim Holtz products at the moment and think I have found the thing I want to work with.
Subscribe to:
Posts (Atom)